A plausible Playwright file is a draft. To rely on it, inspect the expected behavior and see it run against the app. This guide follows TestVibe’s pipeline from description to generated code and completed verification, including what to review when the app changes.
That gap is the whole design problem behind TestVibe's generation pipeline. This post walks through what actually happens between "I typed a sentence describing my feature" and "a green run," from the user's side of the glass: how your description becomes a Gherkin spec, why the AI agent explores your live site before writing a line of code, what the generated code looks like, and what happens when your app inevitably changes.
Step 1: Describe the behavior, not the implementation
Everything starts in the Tests view (called Features in earlier layouts) of your project. You pick a group, choose the action to create or generate a feature, and describe the behavior you want covered — in plain English.
The quality bar here is lower than you might fear, but not zero. Compare:
Test admin stuff.
versus:
Create a feature for an admin inviting a new team member and seeing a success message.
The second one names the actor, the action, and — critically — the visible outcome that proves success. That last part matters most, because a test that clicks around without asserting anything is theater. TestVibe's guidance is the same formula testers have used forever: Given a starting context, When the user acts, Then something visible proves it worked.
You don't have to start from a blank text box either. The project Assistant can explore your app and suggest tests, propose what to test first, point out coverage gaps, or generate a test straight from a description you type into chat.
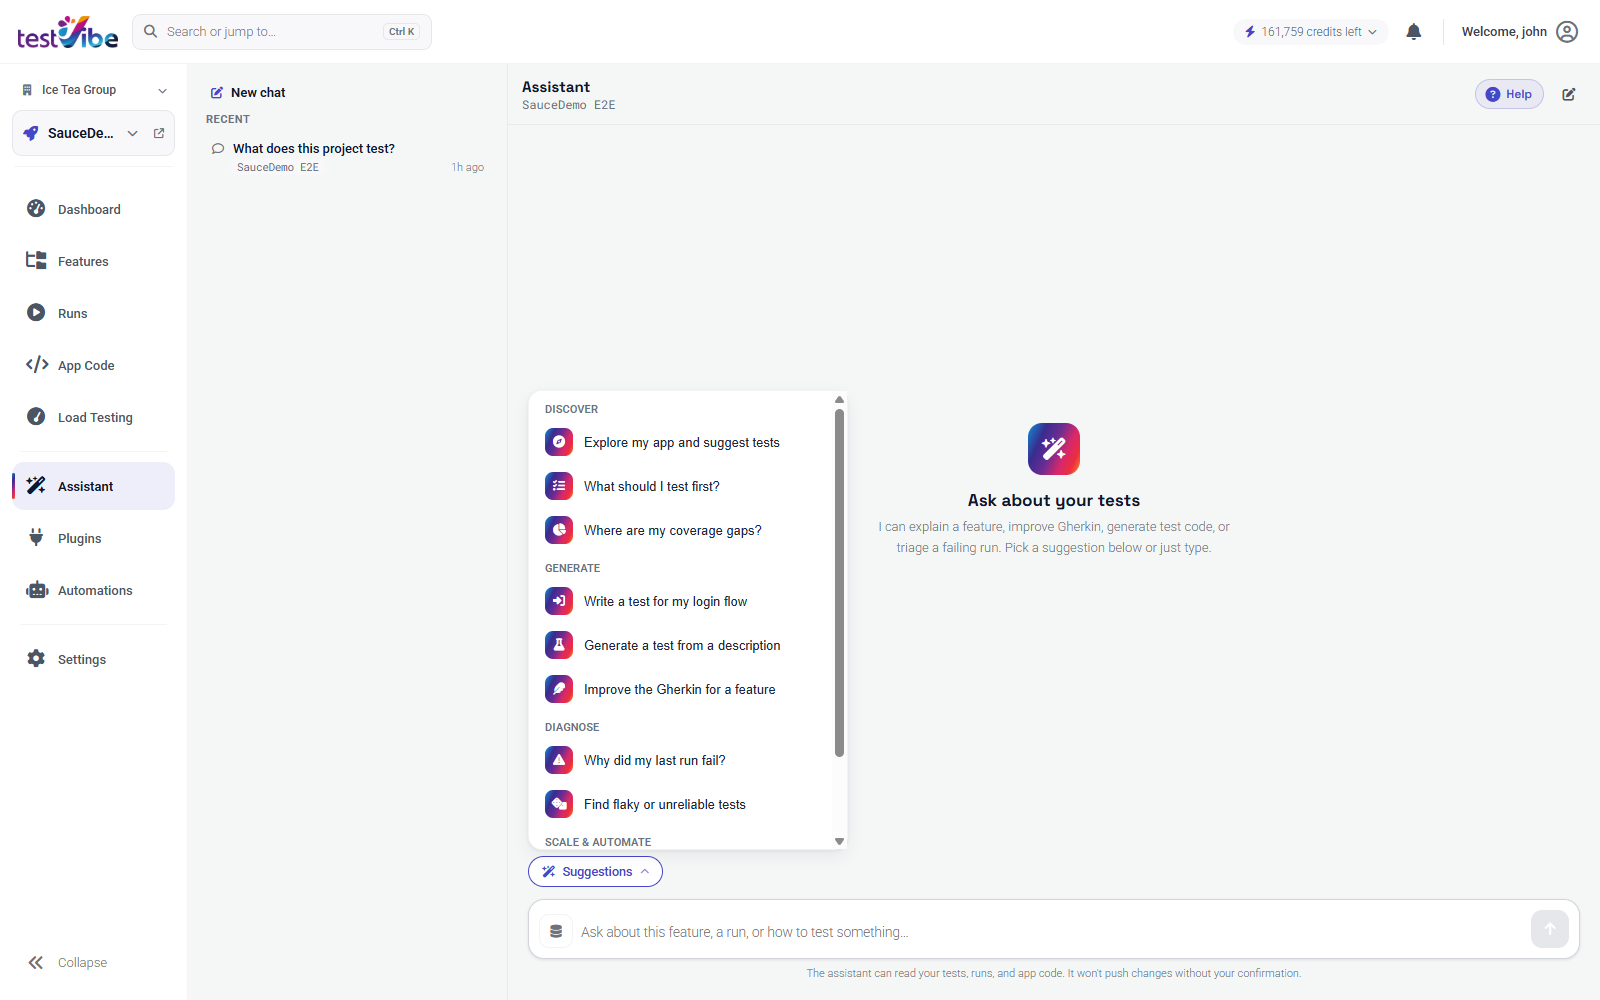
Step 2: The Gherkin draft — a spec you can actually read
Your description becomes a .feature file in Gherkin: a structured, human-readable spec with a Background (shared setup), Scenarios, and steps. This is the contract between you and the generated code — if the Gherkin is wrong, the code will be wrong too, so TestVibe opens the draft for review and editing before any Playwright code exists.
A well-drafted feature has a few properties worth knowing about:
- It starts at the entrypoint. The
Backgroundreaches the starting screen the way a real user would — landing page, sign-in, navigation — rather than assuming an already-logged-in, already-navigated state. A test that "assumes" its starting point works on your machine and nowhere else. - Secrets are tokens, not values. Credentials come from Settings → Variables & Secrets and appear in the spec as tokens like
{{var:LOGIN_USERNAME}}and{{secret:LOGIN_PASSWORD}}, so passwords never live in test text. - Created data can use a run-specific suffix. Add
{{unique}}where needed, for examplea project named "Project {{unique}}". The run-scoped timestamp helps separate repeat runs; concurrent users, reused records and cleanup still need an explicit isolation strategy. - Steps name visible things.
When I click the "Add to cart" button on the "Sauce Labs Backpack" product cardgives the generator (and the next human reader) something concrete to find.
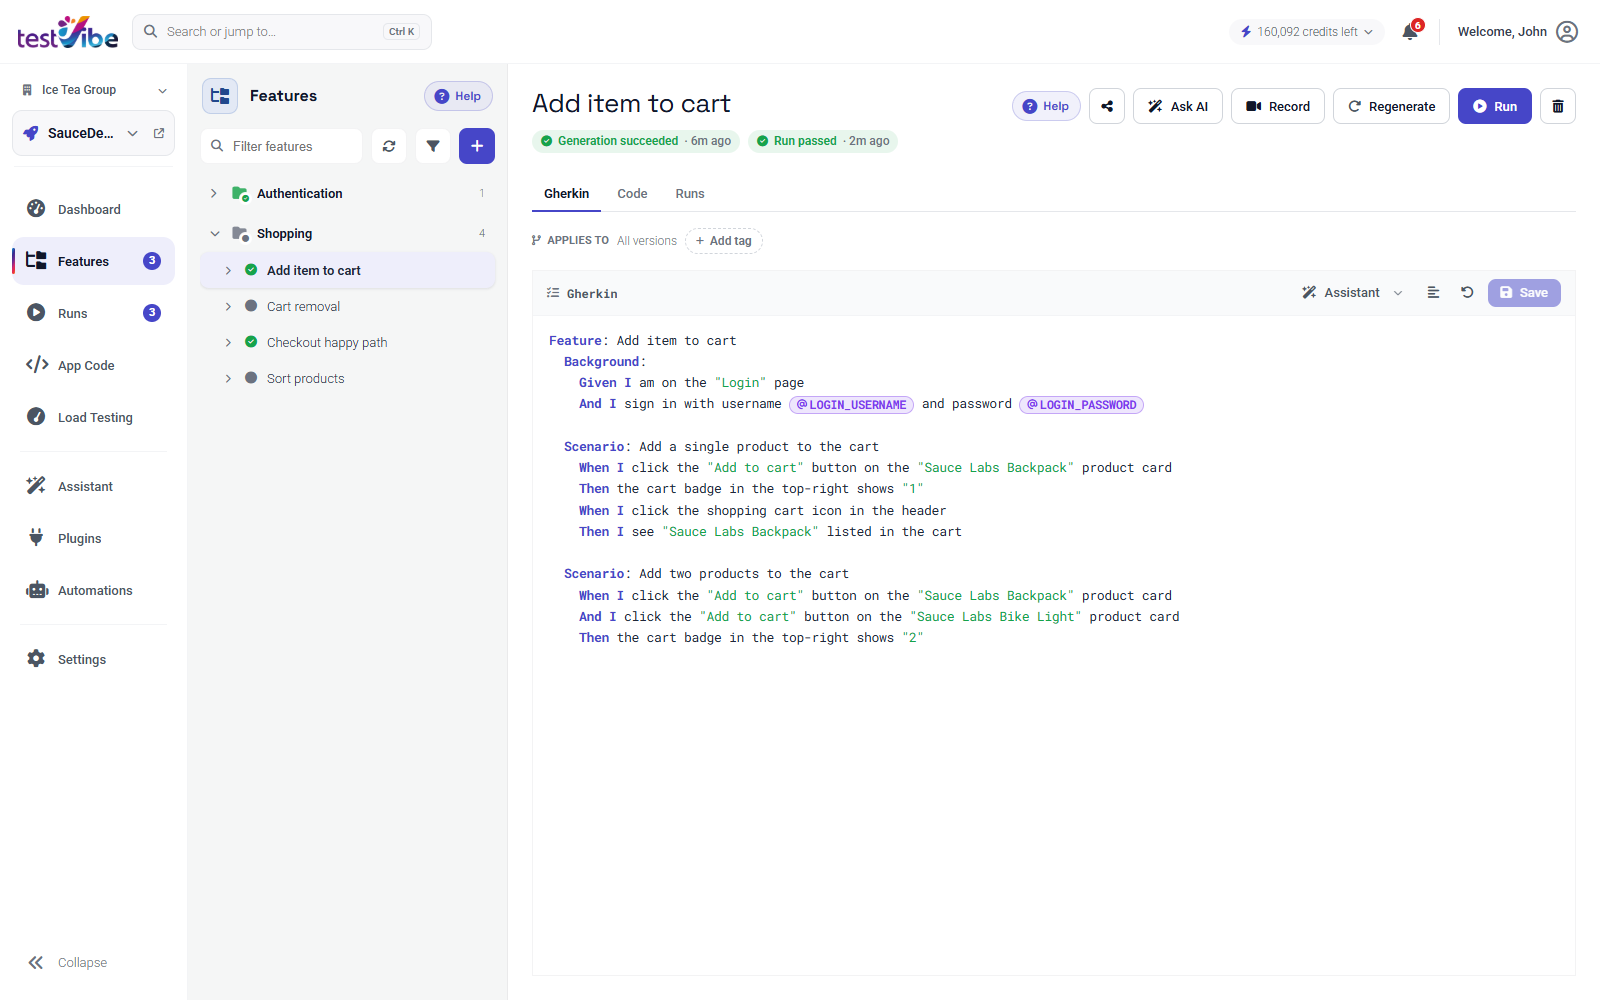
Here's the full arc for a small example. You type:
Cover removing an item from the cart and verifying the cart badge disappears.
TestVibe drafts something like:
Feature: Cart removal
  Background:
    Given I am on the "Login" page
    And I sign in with username "{{var:LOGIN_USERNAME}}" and password "{{secret:LOGIN_PASSWORD}}"
    And I click the "Add to cart" button on the "Sauce Labs Backpack" product card

  Scenario: Remove an item from the cart page
    When I click the shopping cart icon in the header
    And I click the "Remove" button next to "Sauce Labs Backpack"
    Then the cart list is empty
    And the cart badge in the top-right is not shown
You review it, tighten a step if needed, save — and only then does code generation start.
Step 3: Live exploration — the agent uses your real app first
This is the part that separates generation from autocomplete. When you start generation, TestVibe spins up an isolated cloud test session, and the AI agent opens your actual site and works through the same phases every time:
- Exploring the app. The agent probes the UI the feature describes — finds the real buttons, the real labels, the real timing quirks — before committing to any code.
- Writing the test. It authors the Playwright code for each scenario, grounded in what it just observed.
- Verifying, run N. It replays what it wrote against the live site. A failed verification loops back to writing and tries again.
- Final verification. Once every scenario is recorded, TestVibe runs the whole assembled spec end-to-end.
You watch all of this live in the generation drawer: section-by-section progress through Background and each Scenario, per-step credit/time/tool-call counts, screenshots of what the browser saw, and trace links. If the agent hits something genuinely ambiguous, generation can pause and ask you a question mid-run, which you answer right in the drawer.
Exploration grounds selector choices, but generated selectors can still be wrong. The agent isn't pattern-matching on what login forms usually look like — it found your login form, typed into it, and watched what happened.
Step 4: Code you'd accept in review
The output is a standard Playwright test file, saved into your project alongside the feature it belongs to. Two quality properties are worth calling out.
Web-first assertions. Generated code proves outcomes with Playwright's auto-retrying expect matchers on locators — toBeVisible, toHaveText, toHaveCount — rather than grabbing a value and comparing booleans. The difference is the whole flake-vs-reliable divide:
// What TestVibe generates: the matcher waits and retries
await expect(page.getByText('Sauce Labs Backpack')).toBeHidden();
await expect(cartBadge).toHaveCount(0);

// Pattern to review and avoid: a snapshot assertion that can race
const visible = await badge.isVisible();   // snapshots one instant
expect(visible).toBe(false);               // passes or fails on timing luck
Readable locators. Roles, names, and visible labels over brittle generated IDs — page.getByRole('button', { name: 'Login' }) — so the code survives small layout changes and a human can tell what it does.
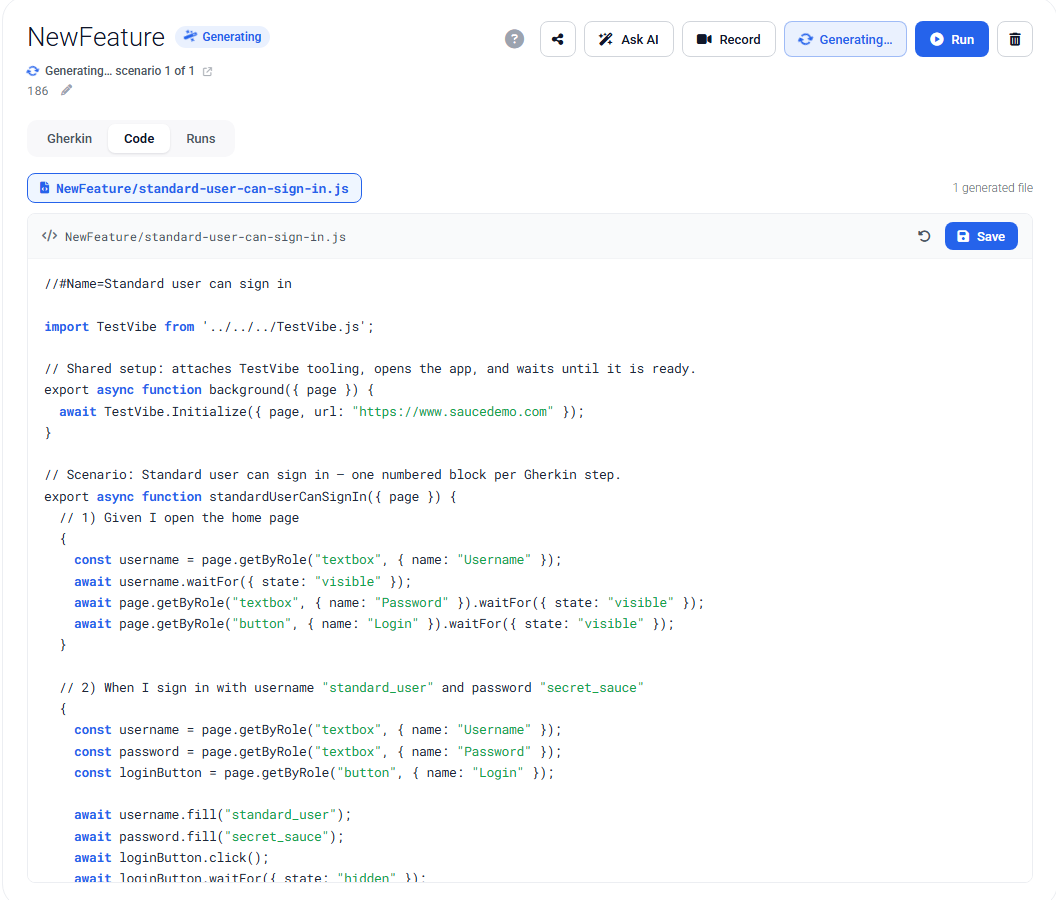
The Code tab also has an entry state before reusable Playwright code is saved. The capture above shows that state and its Generate test code action. After generation, inspect the actual saved spec and its verification evidence.
Step 5: Verified before it's delivered
A feature only reaches generated status after final verification passes — the complete assembled spec, run end-to-end. There is no way to skip this check, and that's deliberate. Recording each step successfully is not the same thing as the finished test passing a real run.
The reason is a principle that shapes the entire pipeline: a test must be proven under the same conditions it will actually run in. The agent works in a warm, already-navigated session at human speed; your scheduled test runs cold — fresh browser, fresh context, from the entrypoint, at machine speed. TestVibe treats that gap as the enemy. Draft recording and streamed output are not equivalent to a passing cold replay. Review the completed verification evidence: inspect shared navigation and login in the Background, visible assertions and scenario isolation. A passing verification shows that the saved assertions passed in that configuration; review their meaning and completeness separately.
The user-facing payoff is simple: "generation succeeded" records a passing verification for that job, not "this test compiled." When you hit Run afterward, you're re-running something that has already survived the verification configuration. Other targets, configurations, app states and later changes still require their own run.
One more artifact worth reading after success: the What the Assistant learned card. It lists app-specific behavior the agent discovered while exploring — a control that needs a beat before it's clickable, navigation it had to work around. It answers why the test is built the way it is, not just what it does.
When your app changes: regenerate, don't rewrite
Six weeks later the "Save" button becomes "Save changes" and the test goes red. This is where the spec-first design pays rent: the Gherkin is the durable asset, and the code is regenerable.
The workflow is deliberately boring:
- Open the feature and review the failed run's evidence (screenshots, trace, failed step).
- If the behavior changed, edit the Gherkin to match reality. If only the UI surface changed, the spec may already be fine.
- Hit Regenerate. The agent re-explores the live app — the current app, with the renamed button — and produces fresh, re-verified code against it.
The docs are blunt about one anti-pattern: don't regenerate blindly in a loop. If the output missed your intent, the fix is almost always an input fix — a clearer label in a step, a stronger Then, a missing secret, a Background for setup — then one regeneration. And since regeneration can replace generated files, hand-edits to generated code are better promoted into clearer Gherkin, where they'll survive the next regeneration too.
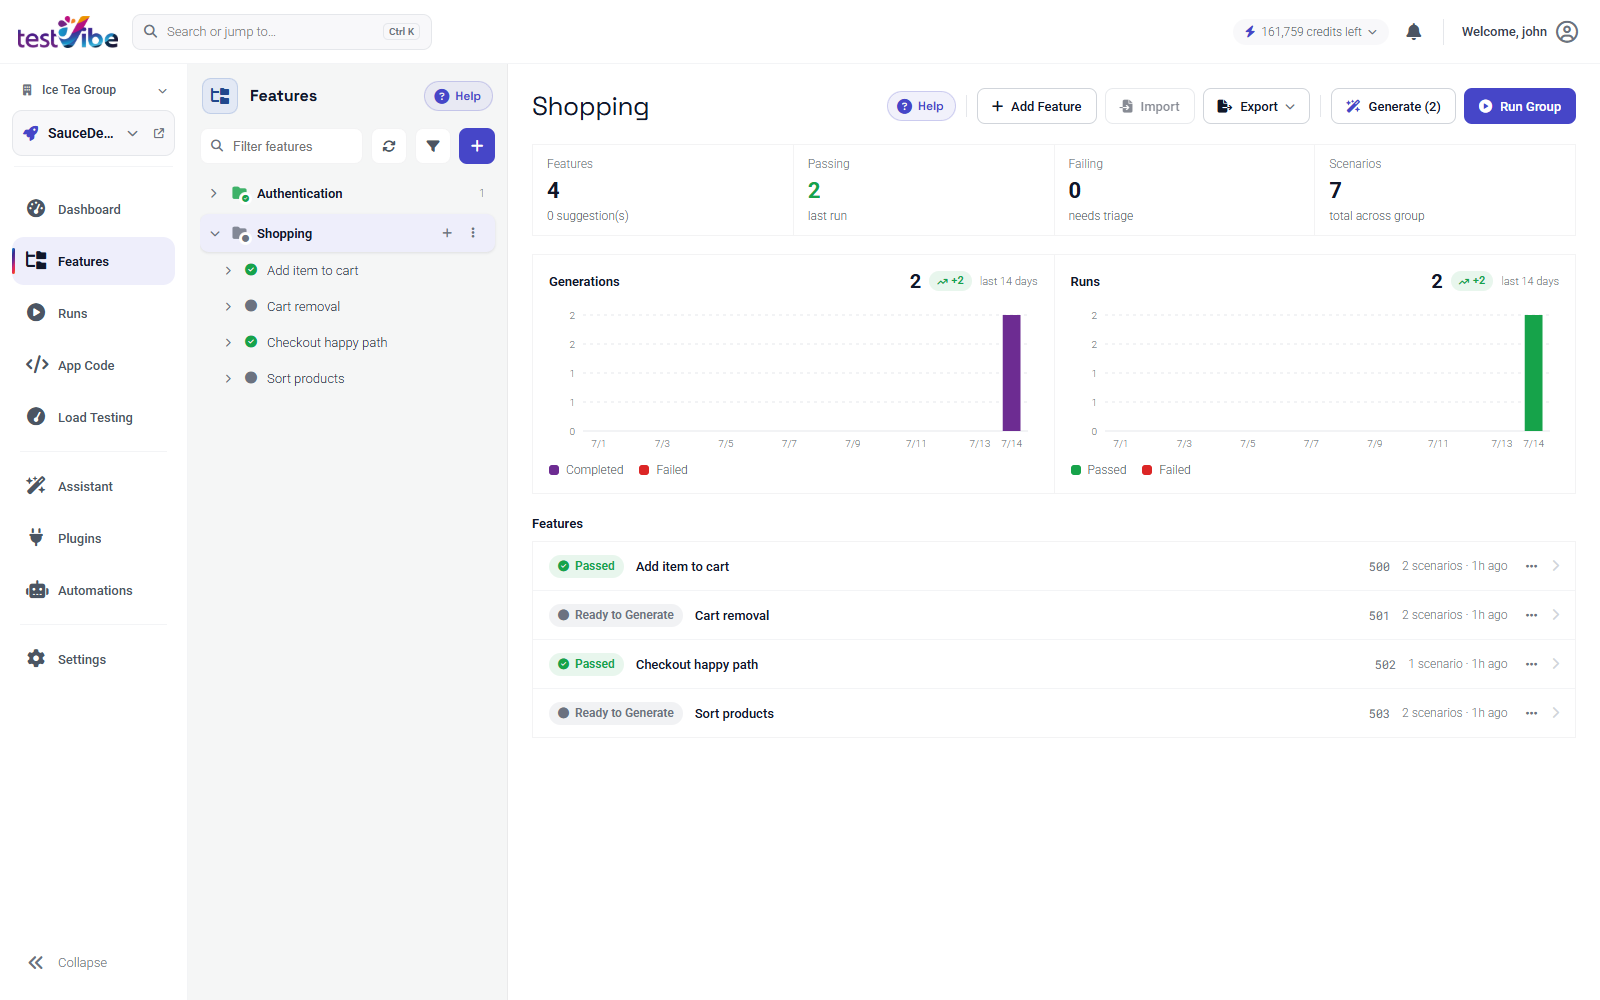
The pipeline in one sentence
Describe the behavior → review a readable Gherkin spec → an agent explores your real app in an isolated cloud session → it writes web-first Playwright code and verifies it against the live site, end to end, before you ever see "succeeded" → and when your app changes, you regenerate from the spec instead of hand-patching selectors.
The spec stays yours and stays readable. Generated code can be edited and saved explicitly, and regeneration can replace it. A green verification is evidence for that run; changes to the app, data, or assertions still require another run. That's the trade TestVibe is built around — and it's why the tests actually pass. Want to see it on your own app? Get early access, or read more in the generation docs.