Start with one browser journey and an observable result: sign in, open the dashboard, and check that the user’s name appears. TestVibe generates Playwright code from your description and verifies it in an isolated cloud session against your site. Review the assertions, run the test, and inspect the available screenshots, video, and trace. For a publicly reachable app, this first workflow needs no local installation, CI pipeline, or repository connection.
This post walks the shortest successful path end to end: sign up, create a project, describe one feature, generate the test, run it, and read the result. Allow time for setup, generation and review; duration varies with your app and provider.
What you need before you start
Two things:
- A way to sign in. Email and password, GitHub, or Google. Every user gets a personal workspace automatically.
- A URL to test. The address of a deployed, staging, or shared QA environment that a cloud session can reach from the internet. (Private apps behind a VPN work too, via a tunnel device — but skip that for your first test.)
You also need permission and available credits for hosted chargeable work, and any credentials required by the target app. The current New project form asks for a name and app URL, with an Include starter tests option.
The walkthrough
1. Sign up and sign in
Choose a sign-in method offered by your instance and complete any verification prompt before continuing.
- Open TestVibe in your browser.
- Pick a sign-in method: Continue with GitHub, Continue with Google, or create a local account with email and password (Create an account).
- If you created a local account, verify your email — follow the verification prompt if shown. Invitation and provider flows can have different verification steps.
- Land in your personal workspace.
One thing worth knowing up front: sign-in is identity-only. TestVibe never asks for repository permissions at sign-in — connecting a source repo is a separate, optional step you can take later from project settings, and you don't need it at all to test.
2. Create a project
A project is one app under test: a name, the site URL(s) to test, and everything that follows — tests, runs, evidence. If this is the first project on your account, TestVibe shows you the creation screen automatically right after sign-in.
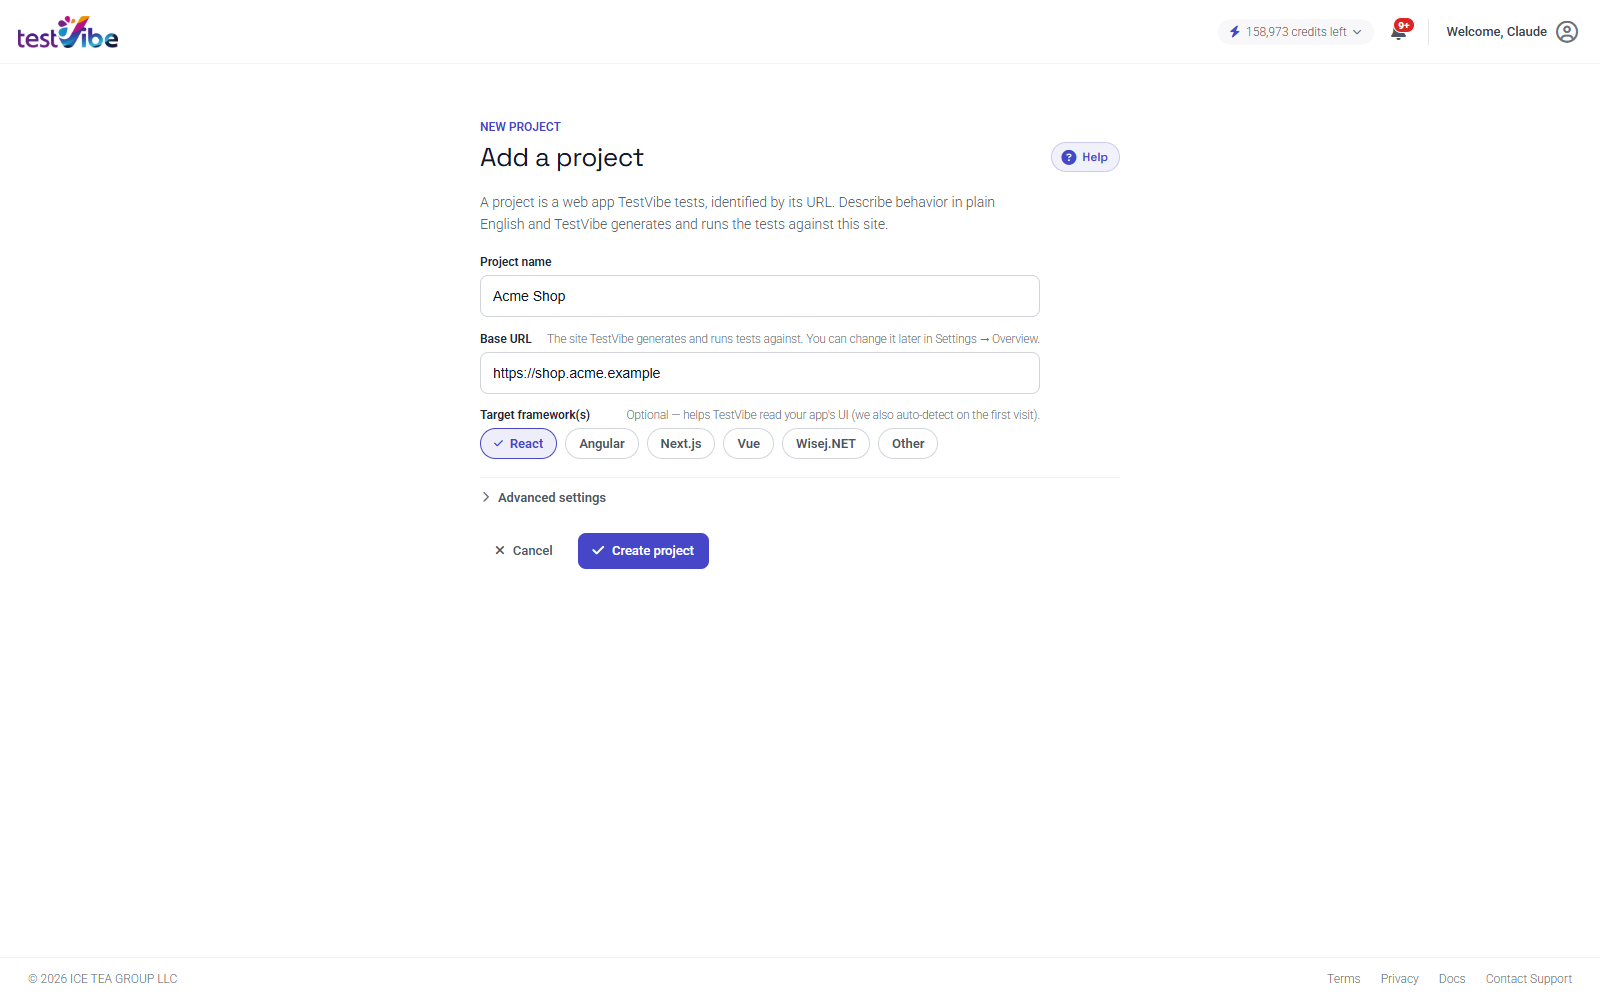
- Enter a project name.
- Enter the base URL of the site you want to test — the address your tests will open.
- Review Include starter tests before creating the project.
- Create the project.
Ordinary project creation does not itself spend generation credits. Follow the setup guide or first-test prompt shown for your account; later projects can land directly in Tests. Start discovery or generation only when you choose that chargeable action.
3. Describe a feature
The Tests section (called Features or Test Suite in earlier layouts) is where test intent lives: groups on the left (think Authentication, Shopping), features and their details on the right.
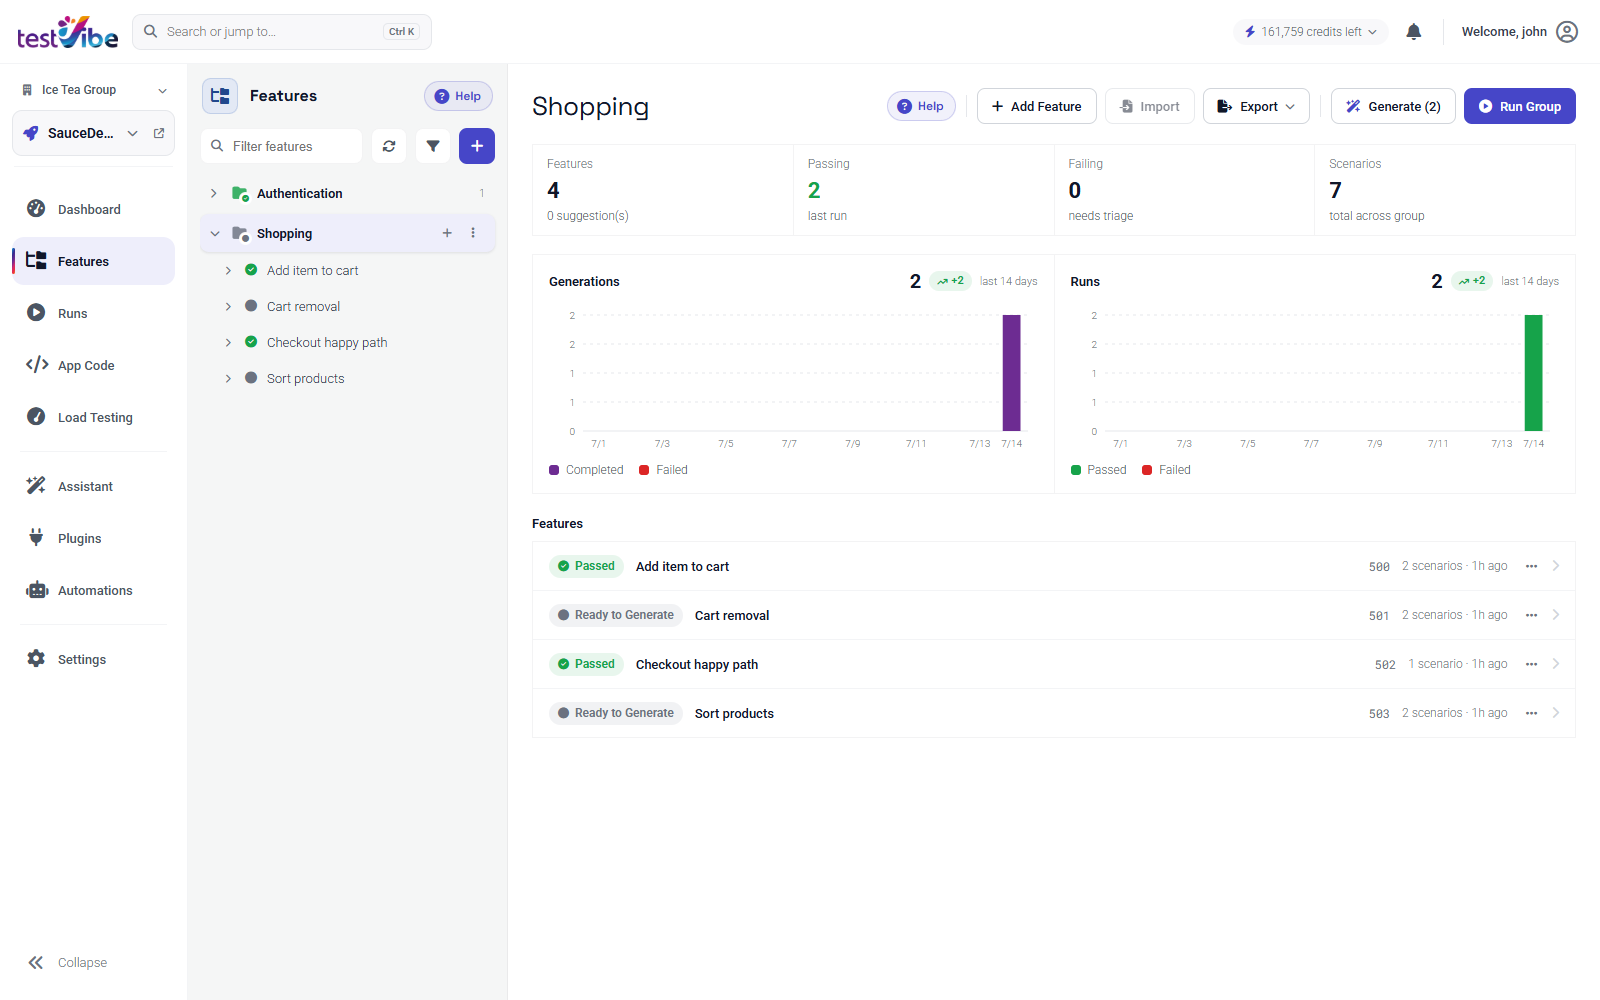
- Create or select a group for the feature area you want to test.
- Create a new feature and give it a clear name.
- Write the behavior as Gherkin-style steps.
- Save. It's stored in your project.
Keep the first test small: one page, one action, one result you can verify. A good template:
Feature: Sign in

  Scenario: User signs in with valid credentials
    Given the user is on the sign-in page
    When the user enters valid credentials
    And the user clicks Sign in
    Then the dashboard should open
    And the user name should be visible in the header
What makes this work: a visible starting point, a concrete user action, and an expected result the generated test can actually assert. Use visible text from your application where possible, and avoid vague phrases like "it should work." If your flow needs credentials, don't hardcode them — add them in Settings → Variables & Secrets and reference them from the test as {{var:NAME}} or {{secret:NAME}}.
4. Generate the Playwright code
Now hand the intent to the AI.
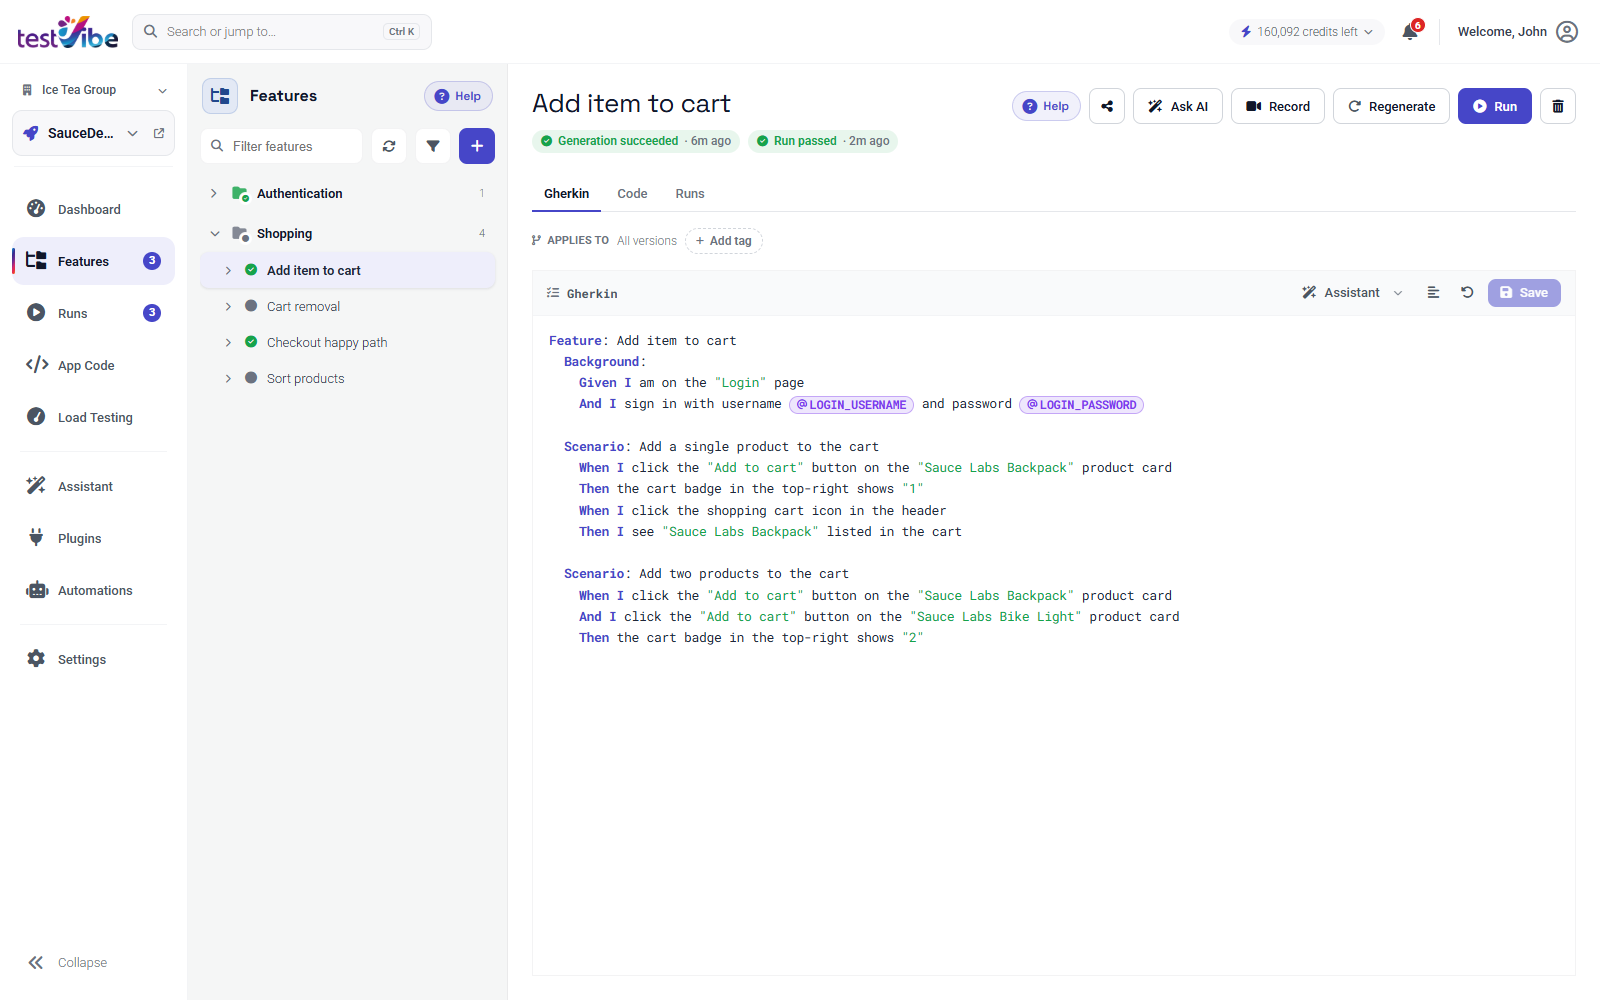
- Select your feature in the Test Suite.
- Start generation from the test details or generation action.
- Confirm the site URL and options if prompted; keep the default agent and model.
- Watch the progress view: queued → setting up → running → finalizing → succeeded.
Follow the generation activity and verification result. Draft instructions and streamed code may appear before verification succeeds; inspect any failure before relying on the generated test.
Under the hood, a cloud agent takes your Gherkin as the source of intent, works against your live site, and produces Playwright code that's saved to your project. This takes a few minutes, and generation usage is metered in credits.
When it succeeds, the feature is ready to run. Before you do, skim the generated output on the Code tab: does it target the right page, and does it check the expected result you wrote? If generation fails instead, open the failure details before touching the test — possible causes include missing variables, target reachability, ambiguous instructions or provider/execution errors. Inspect the actual failure.
5. Run it
Each run executes in an isolated cloud test session. Run just the one test first — a single-test run is faster to troubleshoot than a suite.
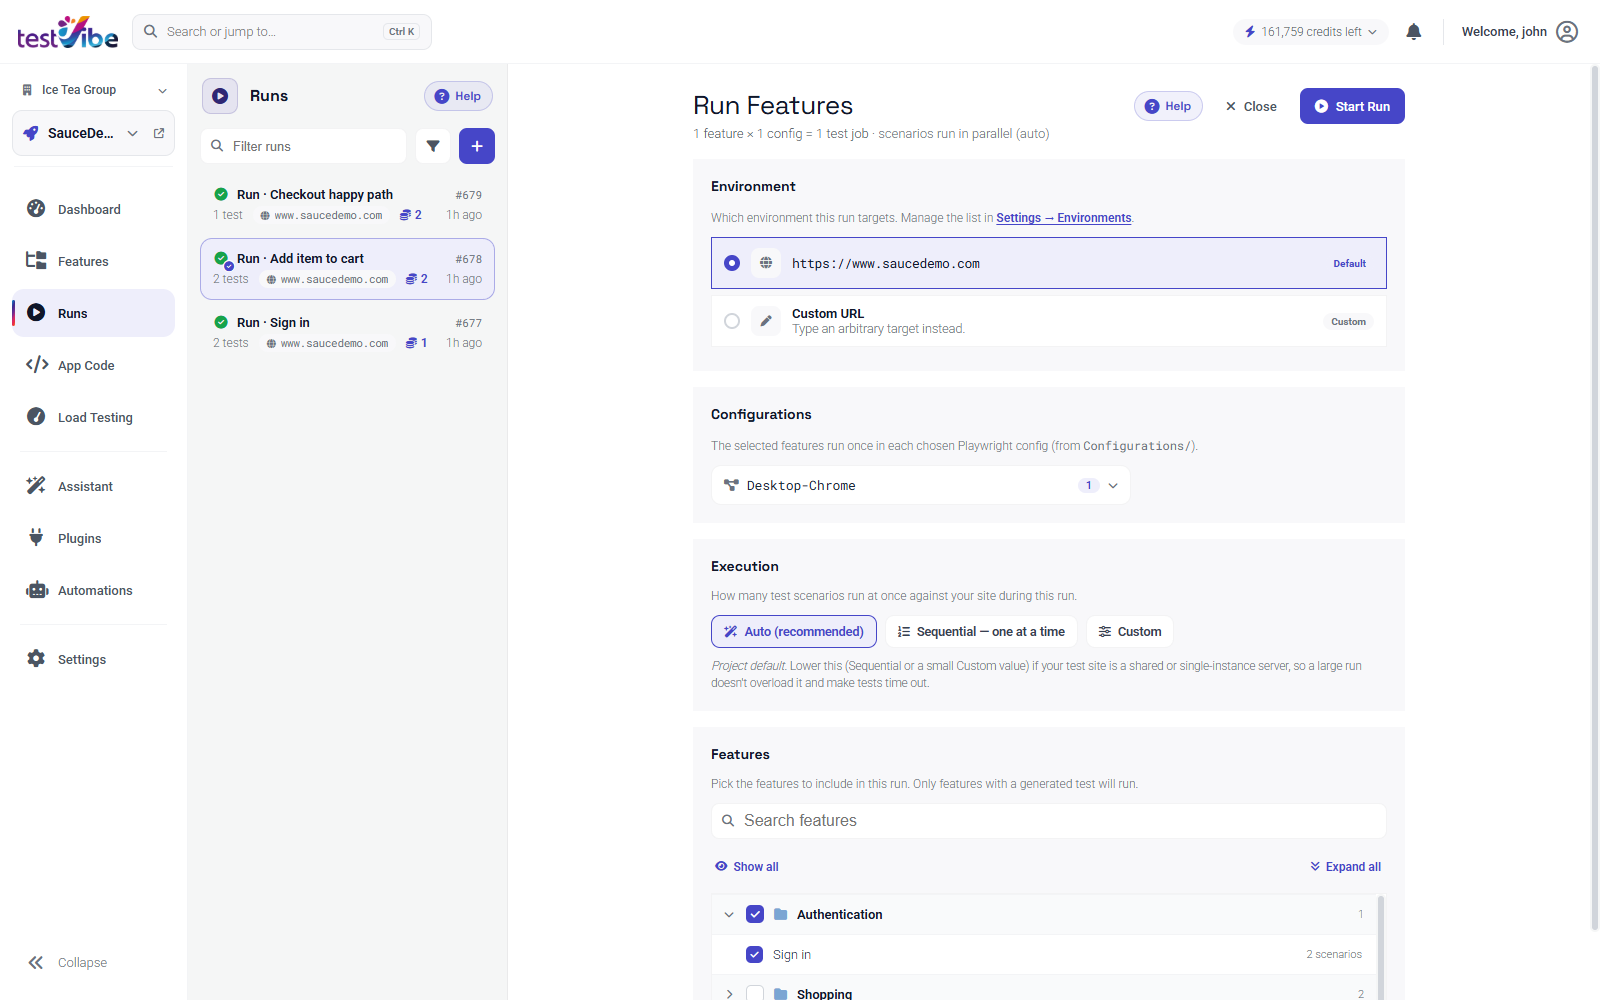
- Select the generated test and choose the run action.
- Confirm the site URL.
- Keep the default browser, viewport, and configuration.
- Start the run.
- Watch the live status: Queued → Preparing → Running, then live per-scenario and per-step progress until it finishes Passed or Failed.
6. Read the result — and the trace
When the run finishes, open the result in the Runs section. Start with the summary: overall status, scenarios passed or failed, duration, browser, and site URL.
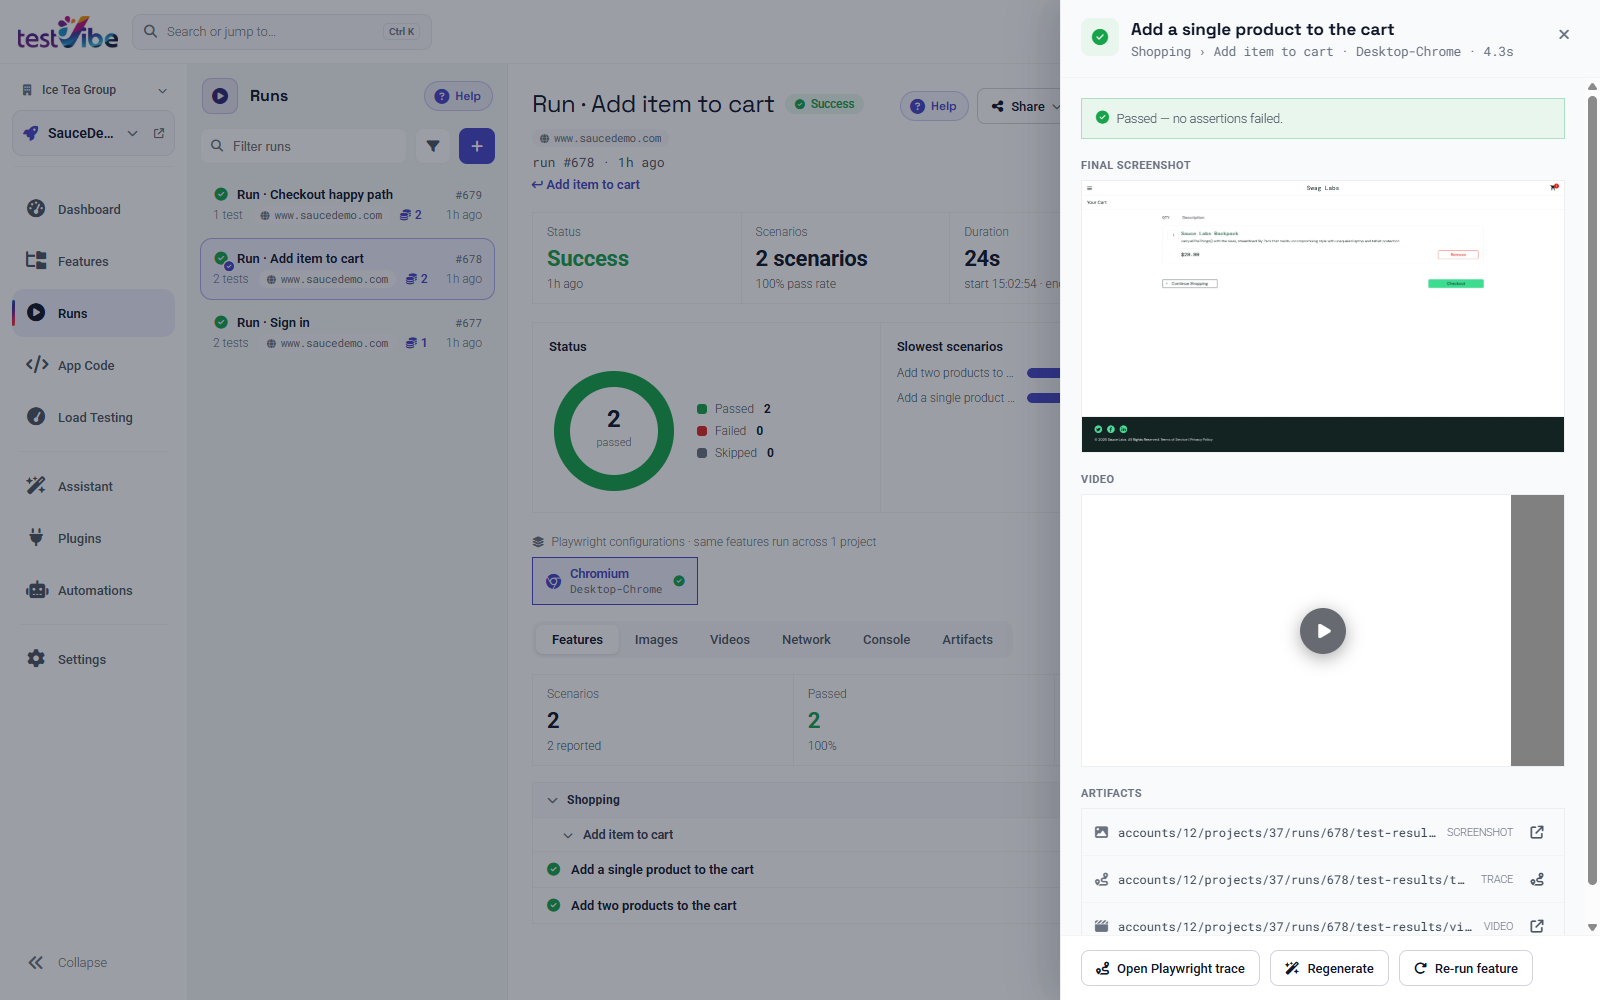
Then drill into the evidence, when captured and successfully uploaded by the run configuration:
- Screenshots — what the page looked like at important moments
- Videos — a replay of the browser session
- Trace — the Playwright trace: every action, DOM snapshots, and timing (open it with Open Playwright trace from a scenario)
- Console and network — browser errors and failed requests
- Failure details — which step or expectation didn't pass
If it passed: you have a working, regenerable test — add another scenario to the same feature, then a related feature, then run a small group. If it failed, resist the urge to immediately edit the test. A failure can mean a real app bug, missing test data, a wrong URL, or a selector that needs refinement — the evidence tells you which. If the test checked the wrong thing, improve the Gherkin and hit Regenerate; the code is disposable, the intent is the source of truth.
Wrapping up
That's the whole loop: describe behavior in plain language, let AI turn it into Playwright code, run it in an isolated cloud sandbox, and get evidence you can actually act on. The intent stays readable, so when your app changes you edit a sentence and regenerate instead of rewriting selectors.
Ready to try it with your own app? TestVibe is in early access — get early access and you'll be first in line to run this exact path: one project, one feature, one passing test. In the meantime, the quickstart docs cover every step in more depth.