Core project operations — author features, generate Playwright tests, run them in cloud sandboxes, and read results — are available from your terminal. Use the installed CLI help and API reference for the operations supported by your server. There are three surfaces, and they're the same thing underneath:
- The
testvibeCLI for humans and shell scripts. - The REST API (
/api/v1/ops/*) for anything that speaks HTTP. - The MCP server for AI agents like Claude, which get every operation as a tool.
The CLI and MCP server are HTTP clients of the same REST API, generated from one shared manifest, with shared server-side authorization. Client presentation and supported operations can still differ; consult the current manifest. Learn one surface and you've learned all three. Here's the full loop, end to end.
Step 0: create an API key
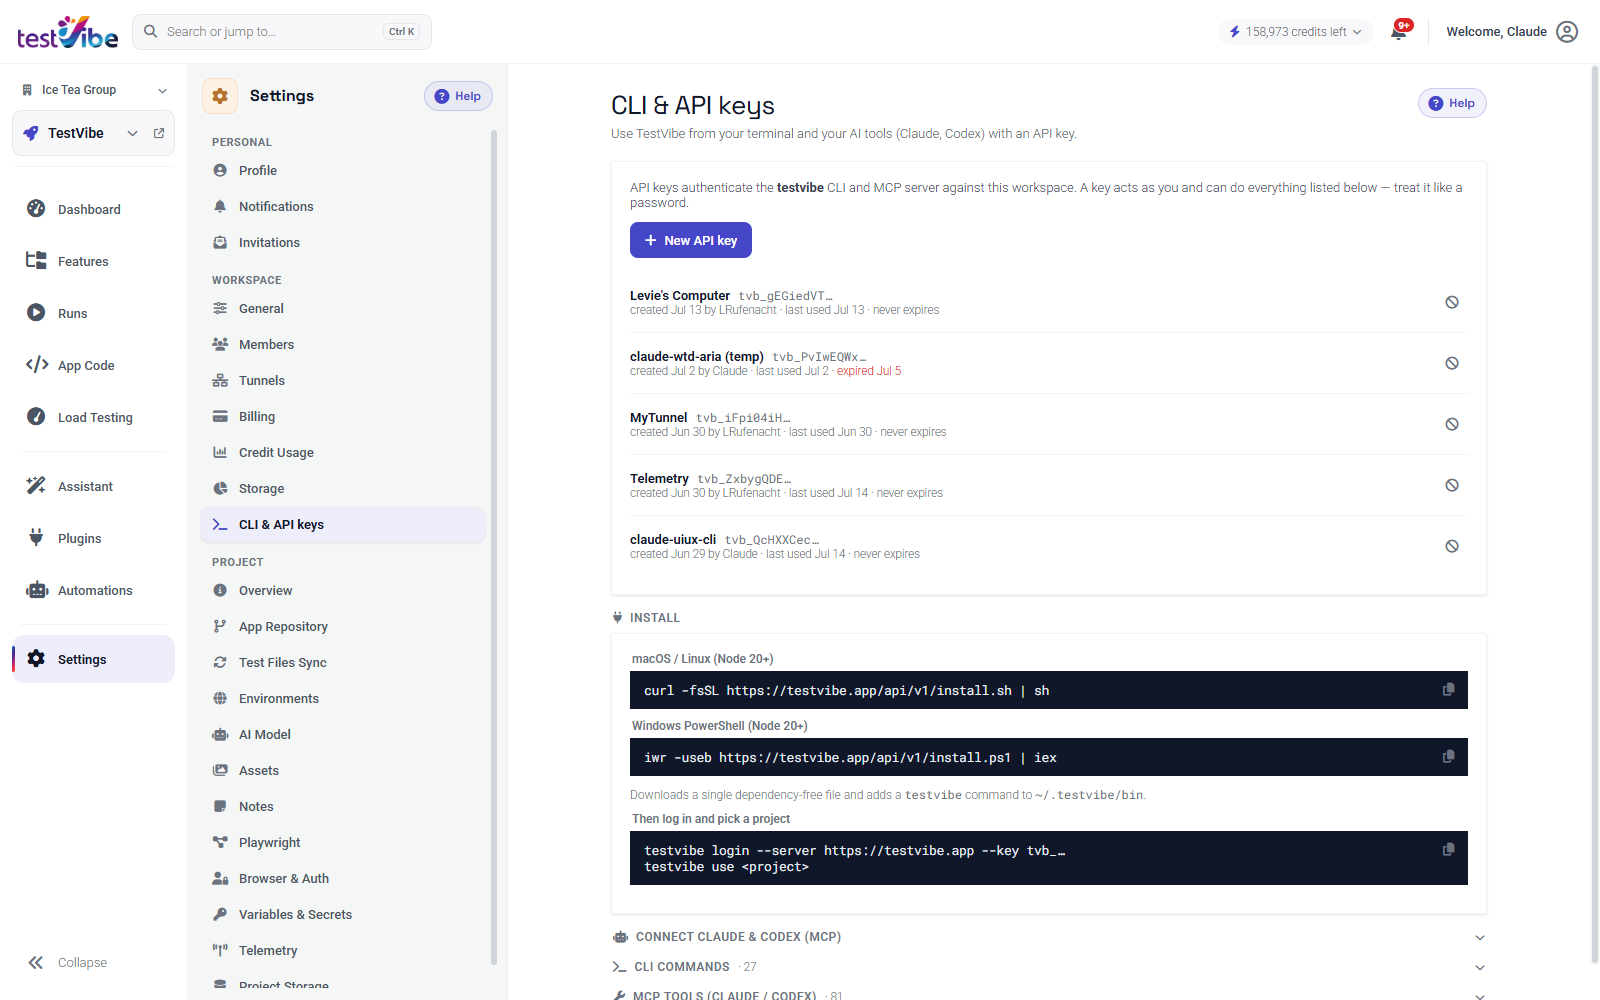
For interactive CLI use, run testvibe login --server https://testvibe.app: it opens browser sign-in and asks you to authorize workspace and project access. Keep the terminal open until login completes; --no-browser prints the sign-in link. For CI and other unattended clients, use an API key. Hosted REST, CLI and MCP access requires Team or higher; Free and Personal do not include it. In the TestVibe app, open Settings → CLI & API keys and create one. Give it a descriptive name — one key per machine or integration keeps revocation painless.
Illustrative, nonfunctional key shape:
tvb_9hK2mPqRsT4uVwXyZ1aB3cD5eF7gH8jL0nQ6rS2tU4vThe full key is shown exactly once, at creation — only a hash is stored server-side, so copy it now. If you lose it, revoke it and create a new one. A key acts as the user who created it, inside the workspace it was created in: its access is constrained by the user's permissions and the credential's granted scope. Revocation, removal from the workspace, or account suspension prevents further authorized use.
Treat keys like passwords: environment variables and secret stores, never committed files.
The CLI: a quick tour
The testvibe CLI is a single dependency-free bundle — all it needs is Node 20+. Install it straight from your TestVibe server (it isn't on the public npm registry, so skip npm install -g testvibe; the Settings → CLI & API keys panel shows the exact command for your setup):
# macOS / Linux
curl -fsSL https://testvibe.app/api/v1/install.sh | sh
# Windows PowerShell
iwr -useb https://testvibe.app/api/v1/install.ps1 | iexLog in once per machine, then pick a default project:
testvibe login --server https://testvibe.app
testvibe use "Acme Shop"
Browser login saves the approved credential locally. For CI, keep TESTVIBE_API_KEY in your secret store and set TESTVIBE_SERVER and TESTVIBE_PROJECT explicitly; do not put a real key in command history or committed MCP configuration.
See what you have:
testvibe projects                          # projects in your workspace
testvibe features list --status generated  # features with runnable tests
testvibe features show "Login Functionality"
Create a feature and generate its tests. A feature is desired behavior described in Gherkin:
testvibe features create "Login Functionality" --file login.feature
testvibe generate "Login Functionality" --watch
Generation runs against the selected execution target and URL; duration depends on the flow and provider. --watch streams per-section progress until the feature reaches generated.
Run tests and read results:
testvibe run "Login Functionality" --waitThe run executes in an isolated sandbox, and --wait prints per-test results when it finishes:
Run #214 passed — 3/3 tests passed (31s)
  ✓ Valid user signs in (4.2s)
  ✓ Invalid password is rejected (3.8s)
  ✓ Locked-out user sees an error (3.1s)
Or run every generated feature at once — one cloud run per feature, summarized at the end:
testvibe run --all --waitDig into a failure:
testvibe runs list --status failed
testvibe runs diagnose 214    # full failure context: errors, Gherkin, executed spec
testvibe runs artifacts 214   # short-lived links to traces, screenshots, videos
There's more — testvibe files for project files, testvibe configs for Playwright configurations, testvibe load for load tests, testvibe automations for schedules, testvibe coverage for coverage scans. Commands print human-readable output. Waiting commands distinguish a failed result (exit 1), generation awaiting human input (exit 2), and a timeout with no final verdict (exit 3). --timeout defaults to 5,400 seconds; zero waits indefinitely. A stopped wait does not cancel the server-side work.
The REST API: same operations, raw HTTP
Prefer curl or your own tooling? The whole surface is resource-oriented JSON over HTTPS, mounted under /api/v1/ops, with your key as a bearer token:
export TESTVIBE_SERVER=https://testvibe.app
export TESTVIBE_API_KEY=tvb_XXXXXXXX…
List projects — the returned id is what you use as {project} in every other route:
curl -H "Authorization: Bearer $TESTVIBE_API_KEY" \
  "$TESTVIBE_SERVER/api/v1/ops/projects"
[
{
"id": "7f3c9a4e-2b1d-4e8a-9c6f-0d5b8a1e2f34",
"name": "Acme Shop",
"baseUrl": "https://shop.acme.example"
}
]Dispatch a run — dispatches return 202 with the id to poll:
export PROJECT=7f3c9a4e-2b1d-4e8a-9c6f-0d5b8a1e2f34

curl -X POST -H "Authorization: Bearer $TESTVIBE_API_KEY" \
  -H "Content-Type: application/json" \
  -d '{"config": "Mobile"}' \
  "$TESTVIBE_SERVER/api/v1/ops/projects/$PROJECT/features/12/run"
{ "runId": 214, "featureId": 12 }Then poll until the run reaches a terminal state. Queued or allocating work is still pending; leaving running alone is not proof of success:
curl -H "Authorization: Bearer $TESTVIBE_API_KEY" \
  "$TESTVIBE_SERVER/api/v1/ops/projects/$PROJECT/runs/214"
The response carries a full results digest: a summary with pass/fail counts, per-test statuses and error messages, and an artifacts manifest you can exchange for download links via the run's /artifacts route.
Ops API errors use this documented shape; transport or proxy failures can differ. An example is — an error code plus a human-readable message that's safe to surface directly:
{ "error": "conflict", "message": "This feature is already generating." }Hosted API budgets are plan-specific: Team has 1,000 requests/hour, Business has 5,000, and Enterprise has no plan-level hourly ceiling. Other abuse controls can still apply. Free and Personal receive 403 plan_forbidden; exceeding an applicable request bucket returns 429 with Retry-After. The full endpoint reference — every operation shown across REST, CLI, and MCP side by side — lives in the API docs.
The MCP server: let your AI agent drive
This is where it gets fun. The same CLI bundle doubles as a stdio MCP server — testvibe mcp — exposing every API operation as a tool, so an AI assistant can manage features, generate tests, run them, and read results on your behalf.
Connect Claude Code:
claude mcp add testvibe \
  -e TESTVIBE_SERVER=https://testvibe.app \
  -e TESTVIBE_API_KEY=tvb_XXXXXXXX… \
  -- testvibe mcp
Claude Desktop, in claude_desktop_config.json:
{
  "mcpServers": {
    "testvibe": {
      "command": "testvibe",
      "args": ["mcp"],
      "env": {
        "TESTVIBE_SERVER": "https://testvibe.app",
        "TESTVIBE_API_KEY": "tvb_XXXXXXXX…"
      }
    }
  }
}
Codex, in ~/.codex/config.toml:
[mcp_servers.testvibe]
command = "testvibe"
args = ["mcp"]
env = { TESTVIBE_SERVER = "https://testvibe.app", TESTVIBE_API_KEY = "tvb_XXXXXXXX…" }
(The Settings → CLI & API keys panel generates these snippets for you, pre-filled with your server URL.)
Then just ask:
List my TestVibe projects, then run the "Login Functionality" feature on Acme Shop and tell me which tests failed.
The assistant chains list_projects → run_feature → wait_for_run → get_run and summarizes the digest. The server is deliberately agent-friendly:
- Tool descriptions carry the workflow —
generate_featuretells the model to follow up withwait_for_generation, so agents discover the dispatch → poll pattern from the schemas alone. wait_*tools perform bounded server-side polling. An unfinished result still needs another status check; client timeout settings vary.diagnose_runcollapses the fix loop — one call returns a failed run's failing tests, the Gherkin, the executed spec source, and artifact paths. Use the explicit artifacts operation for short-lived download links.- Tool annotations mark read-only and destructive tools, so MCP clients can require confirmation appropriately.
And crucially: guardrails are server-side. The MCP server adds no privileges — write allowlists, generation locks, and workspace scoping are enforced by the API regardless of what a model asks for.
Idea: gate your CI on a green run
Because testvibe run --all --wait exits non-zero when any run fails, CI integration is a one-liner. In GitHub Actions:
e2e:
  runs-on: ubuntu-latest
  needs: deploy-staging
  steps:
    - uses: actions/setup-node@v4
      with: { node-version: 20 }
    - name: Install CLI
      env:
        TESTVIBE_SERVER: ${{ vars.TESTVIBE_SERVER }}
      run: |
        curl -fsSL "$TESTVIBE_SERVER/api/v1/install.sh" | sh
        echo "$HOME/.testvibe/bin" >> "$GITHUB_PATH"
    - run: testvibe run --all --url "$STAGING_URL" --wait
      env:
        TESTVIBE_SERVER: ${{ vars.TESTVIBE_SERVER }}
        TESTVIBE_API_KEY: ${{ secrets.TESTVIBE_API_KEY }}
        TESTVIBE_PROJECT: ${{ vars.TESTVIBE_PROJECT }}
        STAGING_URL: ${{ vars.STAGING_URL }}
Use env vars rather than testvibe login in CI, and create a dedicated key so it can be revoked independently. --url points the suite at the deployment under test without touching the project's configured URL. And since tests run in TestVibe's sandboxes, not your runner, the CI job is just dispatch + poll — cheap and fast.
Wrap-up
One API key, three surfaces: script it with the CLI, integrate it over REST, or hand the keys to an AI agent over MCP — with shared server-side authorization and client-specific presentation. Create a project, describe a behavior in plain language, and you're one testvibe generate away from tests running in the cloud.
TestVibe is in early access — get early access and you'll be ready to create your key under Settings → CLI & API keys and take the terminal route. The full reference lives in the API docs.