Your tests are only a gate if something is standing at the gate. TestVibe runs live in the cloud, but you can dispatch them from a pull request, wait for the result, and block the merge when a test fails. This guide wires that up with the testvibe CLI and the REST API, and ends with a GitHub Actions job you can paste in.
Create an API key
For unattended CI, authenticate with a TestVibe API key. Interactive CLI access can instead use browser authorization. Create one in Settings → CLI & API keys: name it after the machine or pipeline that will use it (one key per consumer keeps revocation painless), then copy the value — it is shown once. Treat it like a password, and revoke it from the same panel if a runner is retired or a key may have leaked.
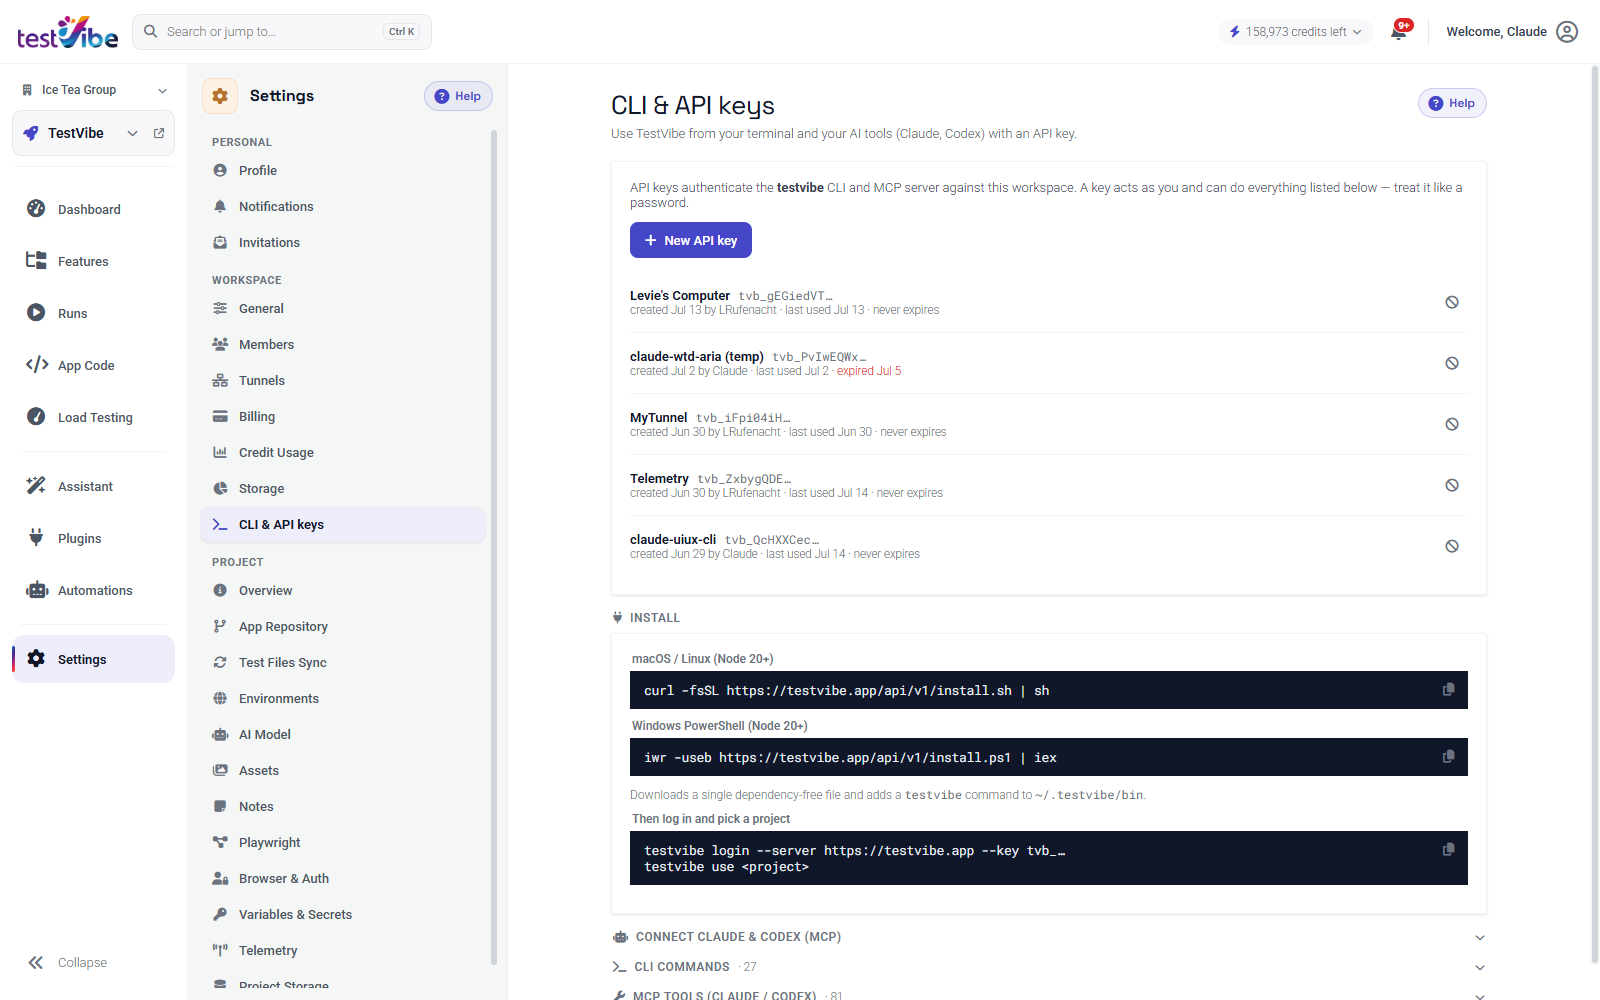
A key is scoped to its workspace and authorized project access. Hosted API/CLI/MCP access requires Team or higher. Browser-based testvibe login is available for interactive work; CI should use a dedicated key from a secret store. In CI you never paste it into a file — store it as an encrypted secret (secrets.TESTVIBE_API_KEY in GitHub Actions) and hand it to the job through an environment variable.
One thing the key is not for: your test's own logins and tokens. Those belong in Settings → Variables & Secrets and are referenced from Gherkin as {{var:NAME}} and {{secret:NAME}}. The API key only authenticates the pipeline against TestVibe.
Install the CLI and point it at a project
The CLI is a single dependency-free file — it is not on the public npm registry, so npm install -g testvibe won't work. The CLI & API keys panel shows the exact install command for your server. On Linux (which is what most CI runners are), it installs into ~/.testvibe/bin:
curl -fsSL https://your-testvibe-url/api/v1/install.sh | shLocally you would then sign in and pick a project:
testvibe login --server https://your-testvibe-url
testvibe use web-checkout
In CI, skip login entirely. The CLI reads three environment variables — TESTVIBE_SERVER, TESTVIBE_API_KEY, and TESTVIBE_PROJECT — so you can set them once at the job level and every command picks them up. That keeps credentials out of any file and makes the steps stateless.
Trigger a run and wait for it
The command that makes CI gating work is --wait. Without it, a run is dispatched and the command returns immediately. With it, the command blocks until the run reaches a terminal state and sets its exit code from the outcome — non-zero if any test failed. That exit code is the whole game: a failing run fails the step, which fails the job, which blocks the merge only when that job is configured as a required check.
# One feature, wait for the verdict
testvibe run "Checkout flow" --wait

# The whole generated suite
testvibe run --all --wait
Point a run at whichever environment the pipeline built. --url overrides the target for that run, so the same suite can hit a per-PR preview deploy or a shared staging URL without editing the project:
testvibe run --all --url https://staging.example.com --waitIf you want to inspect a run after the fact — from a later step, or a debugging session — read it back by id:
testvibe runs list
testvibe runs show <runId>
A GitHub Actions workflow that gates merges
Here is the whole thing: install the CLI, run the suite against staging, and let the exit code decide. Because the run executes in TestVibe's cloud sandboxes, the runner itself needs nothing but Node and curl — no browsers, no Playwright install, no dependency cache.
name: e2e
on:
  pull_request:
    branches: [main]

jobs:
  testvibe:
    runs-on: ubuntu-latest
    env:
      TESTVIBE_SERVER: https://your-testvibe-url
      TESTVIBE_API_KEY: ${{ secrets.TESTVIBE_API_KEY }}
      TESTVIBE_PROJECT: web-checkout
    steps:
      - uses: actions/setup-node@v4
        with:
          node-version: '20'

      - name: Install the TestVibe CLI
        run: |
          curl -fsSL "$TESTVIBE_SERVER/api/v1/install.sh" | sh
          echo "$HOME/.testvibe/bin" >> "$GITHUB_PATH"

      - name: Run the suite and gate the merge
        run: testvibe run --all --url https://staging.example.com --wait
Before using this example, ensure the selected URL serves the intended change. GitHub does not normally provide repository secrets to workflows triggered by fork pull requests; use an explicitly reviewed CI design rather than exposing credentials to untrusted code.
Make the job a required status check in your branch protection rules and the merge button stays disabled until the run comes back green. If you deploy each pull request to its own preview URL, pass that URL into --url instead of the staging one — a common pattern is to compute it in an earlier step and expose it as an output.
The REST path for other CI systems
If your pipeline isn't shell-friendly, or you'd rather not install anything, the same operations are HTTP calls under /api/v1/ops. Every request carries the bearer key:
Authorization: Bearer tvb_…Dispatch a suite run, then poll it to a terminal verdict:
# Dispatch — returns a suite run id
curl -sS -X POST \
  -H "Authorization: Bearer $TESTVIBE_API_KEY" \
  -H "Content-Type: application/json" \
  -d '{"siteUrl": "https://staging.example.com"}' \
  "$TESTVIBE_SERVER/api/v1/ops/projects/$TESTVIBE_PROJECT/runs"

# Poll to a terminal result; queued/allocating are not success
curl -sS -H "Authorization: Bearer $TESTVIBE_API_KEY" \
  "$TESTVIBE_SERVER/api/v1/ops/projects/$TESTVIBE_PROJECT/runs/$RUN_ID"
Your script decides the gate: keep polling pending states, accept only an explicit passing terminal result, and treat failure, cancellation, or an unfinished wait as non-passing. The CLI packages this behavior: exit 1 means failure, 2 means generation needs human input, and 3 means the wait ended without a verdict. Set a suitable --timeout; timing out does not cancel the cloud work.
Practical notes
A few things worth knowing before you rely on this in a busy repo:
- Scripted dispatches are quiet by default. Runs triggered through the API, CLI, or MCP don't fire the account's email and chat notifications — otherwise a nightly suite would flood inboxes. If you want a CI run to notify, add
--notifyto the command. - Rate limits are generous but real. The hosted ops API allows 1,000 requests/hour for Team and 5,000 for Business; Enterprise has no plan-level hourly ceiling. Keys share the workspace budget, and separate IP abuse controls can still apply. Over the limit you get
429 Too Many Requestswith aRetry-Afterheader telling you how long to back off. - You don't always need CI to schedule runs. For a nightly regression pass or a suite that fires whenever a smoke run passes, an in-app Automation does it without an external scheduler — cron or run-finished triggers, no pipeline to babysit. Use CI when the run should gate a specific change; use Automations for time-based or chained coverage.
Wiring TestVibe into CI takes one key, one install line, and one --wait. From there the exit code does the rest, and a red suite keeps a bad change out of main. See the REST API reference and CLI & API keys for the full surface, or get early access to try it against your own app.